Your Control Center
The Lemonade Editor is your control center - where you shape your AI’s personality, knowledge, and superpowers. Let’s walk through each section so you know exactly what’s possible. Think of the Editor as your AI workshop. You have 7 tabs on the left side, each handling a different part of your Lemonade. Plus, there’s a “Run Lemonade” button in the top right to test everything as you go.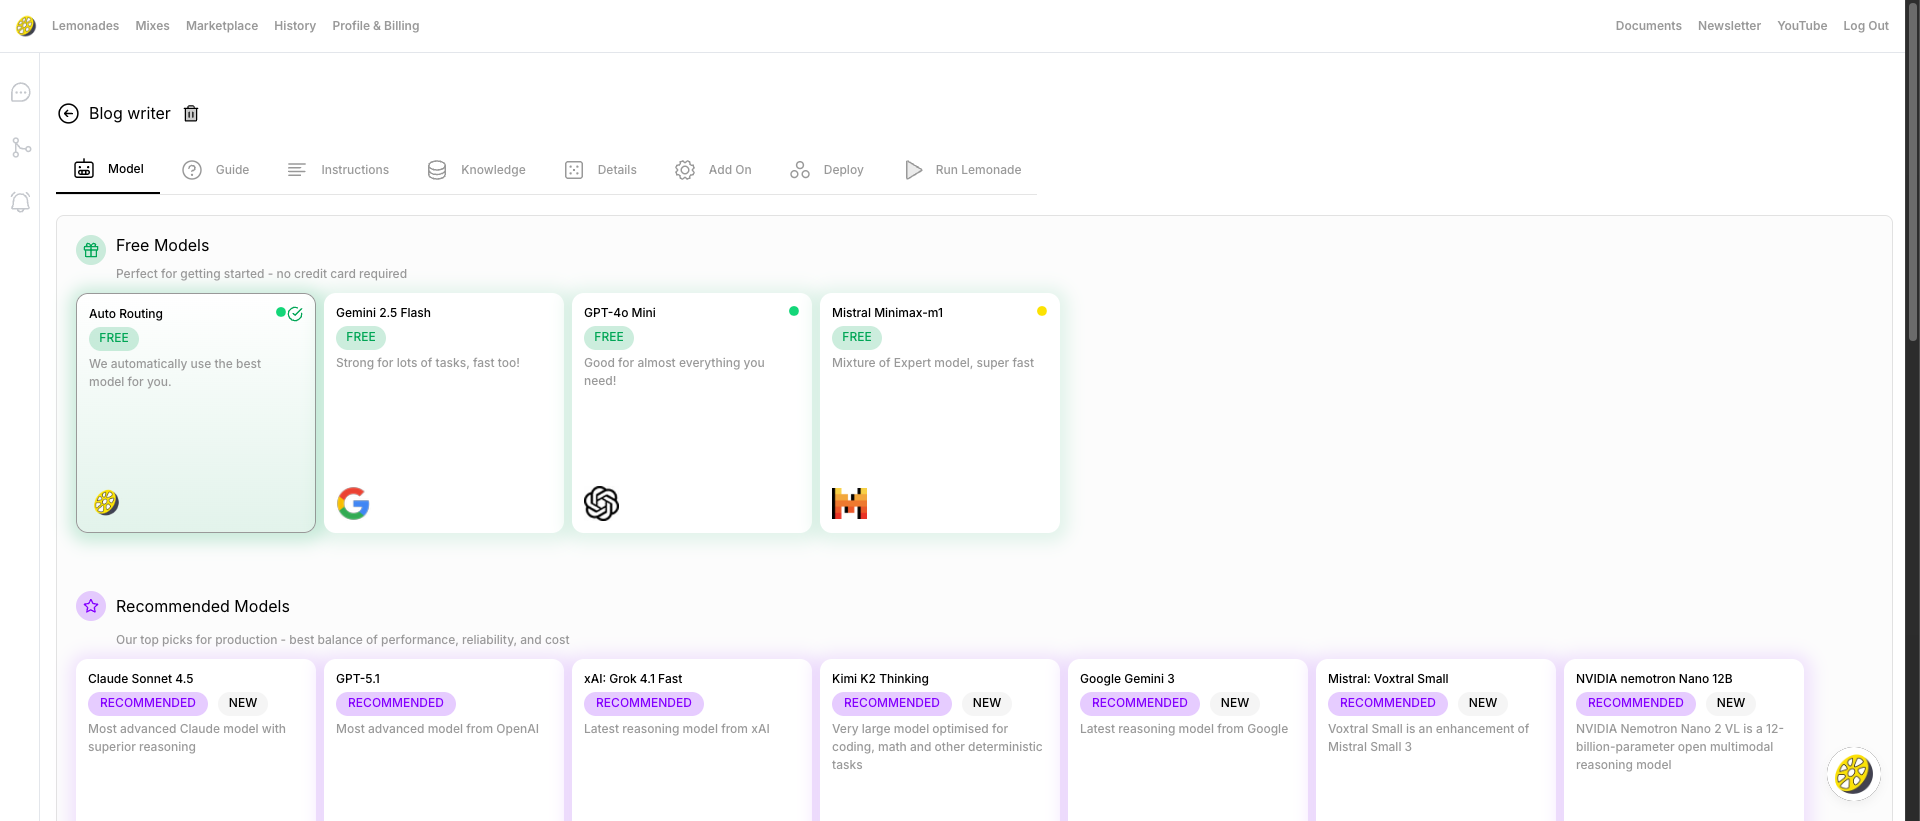
Accessing the Editor
You can also create a new Lemonade by clicking ”+ NEW” and it will open directly in the editor.
Pick Your AI Model
First up: choosing which AI brain powers your Lemonade. Don’t worry about picking the “perfect” model - Auto Routing works great for most people, and you can always switch later.Free Models
No credit card required - perfect for getting started:| Model | Provider | Description |
|---|---|---|
| Auto Routing | LaunchLemonade | We automatically select the best model |
| Gemini 2.5 Flash | Strong for lots of tasks, fast too! | |
| GPT-4o Mini | OpenAI | Solid all rounder, the one who started this all |
| Minimax-m1 | Mistral | Mixture of Expert model, super fast |
Recommended Premium Models
Best balance of performance, reliability, and cost:| Model | Provider | Description | Tags |
|---|---|---|---|
| Claude Sonnet/Opus | Anthropic | Advanced Claude model with superior reasoning | Recommended, New |
| GPT | OpenAI | Broad capability, strong with structured outputs | Recommended |
| Kimi K2 Thinking | MoonshotAI | Optimised for coding, math, deterministic tasks | Recommended, New |
| Gemini | Large context windows, strong all rounder | Recommended, New | |
| Mistral Voxtral Small | Mistral | Enhancement of Mistral Small 3 | Recommended, New |
| NVIDIA Nemotron Nano 12B | NVIDIA | 12B parameter open multimodal reasoning | Recommended, New |
Check Your Progress
A helpful checklist showing what your Lemonade needs to work properly.Mandatory Requirements (3 items)
Your Lemonade needs at minimum:- ✅ Connected to a Model - Select a model in the Model tab
- ✅ Has an Instruction - Add instructions in the Instructions tab
- ✅ Has a Welcome message - Set a welcome message in the Instructions tab
Optional Upgrades
Enhance your Lemonade with:- 📄 Add files to enhance knowledge (and make it better than ChatGPT!)
- 🔗 Add website or other links to fine tune your Lemonade
Set Up Instructions
This is where you give your AI its personality and job description.
Welcome Message
The first message sent when someone starts a chat. Default: “Hello , how can I help you today?”Use
{first_name} as a placeholder to automatically insert the user’s first name!- Be friendly and inviting
- Briefly explain what the Lemonade can help with
- Ask an open-ended question to start the conversation
Instructions
This is where you give your AI its personality and job description. Think of it like hiring someone - you’re writing their role and guidelines.Developers call this a “system prompt” - now you know the lingo!
- Be specific about the Lemonade’s role
- Define its personality and tone
- Set boundaries on topics
- Include any specific knowledge or context
Add Your Knowledge
Train your Lemonade with your own data to make it an expert in your domain.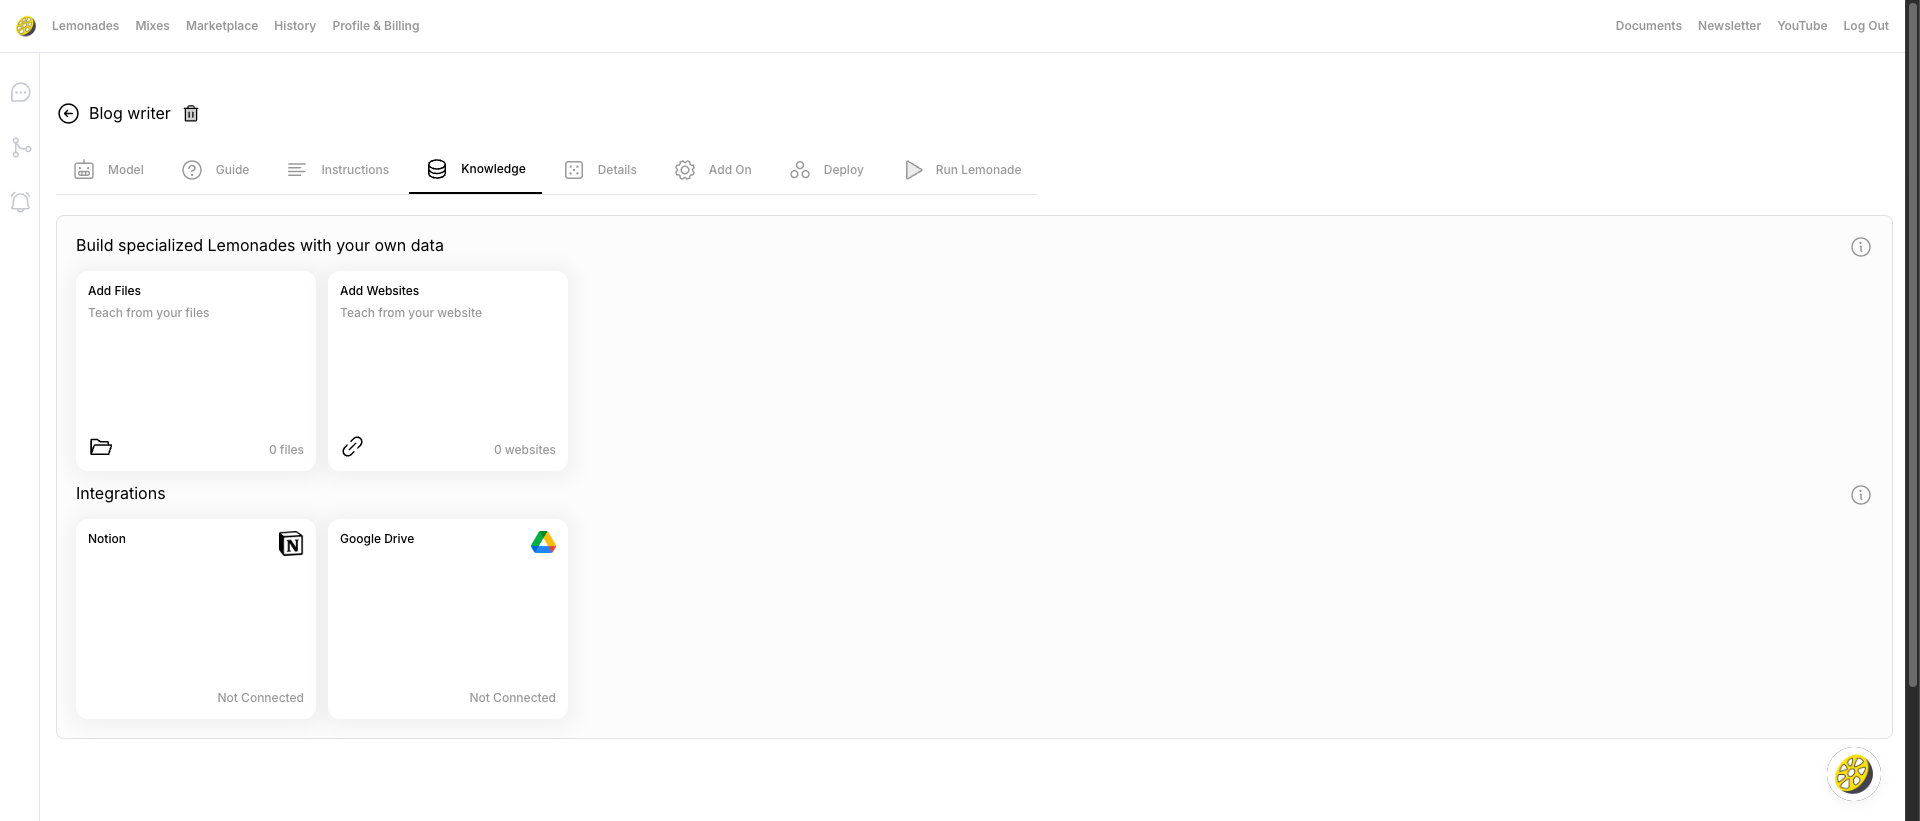
Add Files
Upload documents to give your Lemonade specific knowledge:- Click “Add Files”
- Upload PDFs, Word docs, spreadsheets, etc.
- Files are processed and indexed
- Your Lemonade can reference this information
Add Websites
Teach your Lemonade from web content:- Click “Add Websites”
- Enter any URL
- The content is crawled and indexed
- Great for product pages, FAQs, documentation
Integrations
Connect external data sources:| Integration | Description |
|---|---|
| Notion | Connect your Notion workspace |
| Google Drive | Connect your Google Drive files |
Customize Identity
Give your Lemonade its name, style, and personality.Lemonade Name
Give your Lemonade a memorable, descriptive name.Brain (NEW!)
Select which Brain context to use for this Lemonade.Brains are created in Profile & Billing → Brain. They let you share memory across multiple Lemonades.
Lemonade Description
Add a brief description of what your Lemonade does. Why it matters:- Helps you remember what each Lemonade is for
- Shown to users if you sell your Lemonade
- Good for organization
Lemonade Style
Choose a visual style/avatar for your Lemonade.- Select from preset styles
- Upload a custom image
- Affects how your Lemonade appears in cards and chats
Power Up with Add-Ons
Enable powerful additional features to make your Lemonade even better.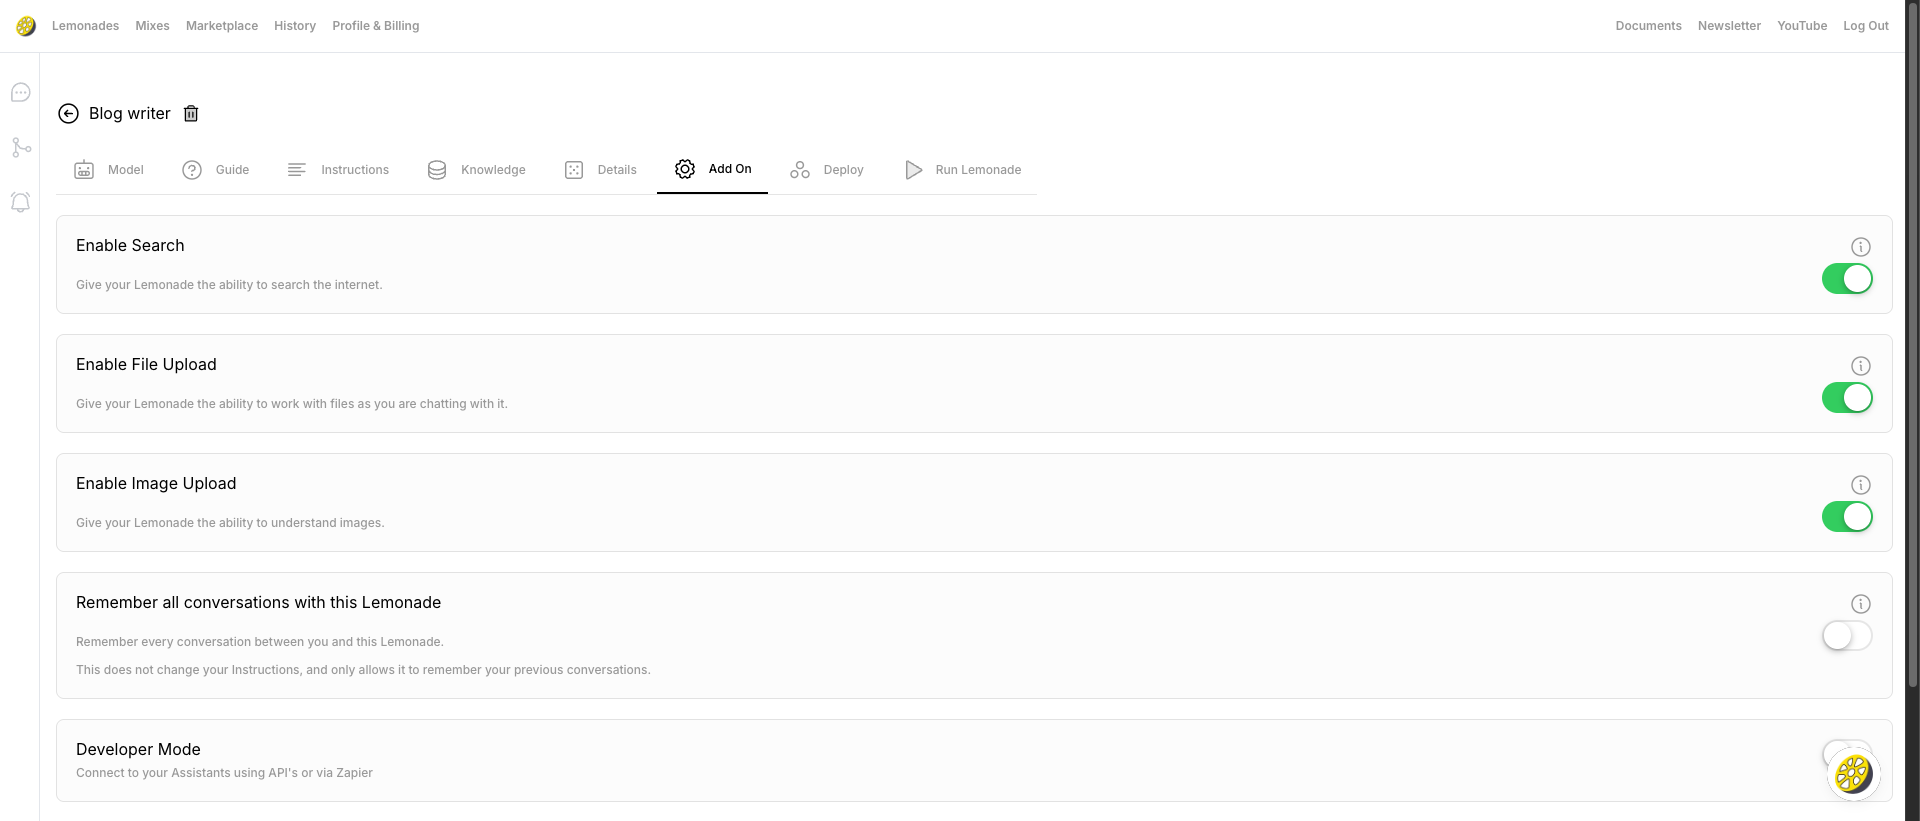
| Feature | Description | Default |
|---|---|---|
| Enable Search | Let your Lemonade search the internet for current information | Off |
| Enable File Upload | Users can upload files during chat for analysis | On |
| Enable Image Upload | Users can share images for your Lemonade to understand | On |
| Remember All Conversations | Lemonade remembers all chats (persistent memory) | Off |
| Developer Mode | Connect via API or Zapier for automation | Off |
Enable Search
Turn this on if your Lemonade needs access to current information beyond its training data.Enable File Upload
Allows users to upload documents during a chat. Great for:- Document analysis
- Data extraction
- File-based Q&A
Enable Image Upload
Allows users to share images. Your Lemonade can:- Describe images
- Analyze visual content
- Answer questions about images
Remember All Conversations
When enabled, your Lemonade will remember all previous conversations.Developer Mode
If you’re a developer (or work with one), this lets you connect your Lemonade to other apps and build custom integrations. Not a developer? You can safely skip this!What Developer Mode Enables
What Developer Mode Enables
When you turn on Developer Mode, you get:
- API Access: Connect your Lemonade to custom applications
- Zapier Integration: Automate workflows with 5,000+ apps
- Webhook Support: Get notified when things happen
- Custom Integrations: Build your own tools using your Lemonade
Share Your Lemonade
You’ve built something amazing - now let’s get it out into the world! Here are your options for sharing your Lemonade.
Deploy as an Employee via Email
Email your Lemonade directly from your inbox - like having an AI assistant you can email anytime. Setup:- Add a custom email address (e.g.,
support@ai.launchlemonade.app) - Click COPY EMAIL, SAVE TO GMAIL, or SAVE TO OUTLOOK
- Email from your registered address to start chatting
For security, only emails from your registered email address will be processed.
Deploy as a ChatBot on your website
Embed your Lemonade as a chat widget on any website. Pricing: Contact us Steps:- Click “CREATE EMBED MIX”
- Customize your branding
- Get your embed code
- Add to your website
Deploy on your Domain to sell
Monetize your Lemonade with subscriptions - turn your AI into a business. Pricing: Contact us Steps:- Click “CREATE SUBSCRIPTION MIX”
- Set up your pricing and domain
- Test before going live
- Start earning!
Test Your Creation
Click “Run Lemonade” in the top right to test your creation. This opens a chat interface where you can:- Test your welcome message
- Try different questions
- Verify knowledge is working
- Check the tone and behavior
Saving Your Work
Good news: your changes save automatically as you work. You’ll see a quick confirmation when everything’s saved. Click the back arrow (←) when you’re ready to return to your dashboard.Deleting a Lemonade
To delete a Lemonade:- Click the trash icon (🗑️) next to the Lemonade name
- Confirm deletion
What’s Next?
Now that you know your way around the Editor, here’s how to take your Lemonade to the next level:Deploy Your Lemonade
Share your AI tool with the world via email, website, or custom domain
Add Knowledge Files
Upload documents and websites to make your Lemonade an expert
Set Up Memory
Give your Lemonades persistent memory with the Brain feature
Explore Templates
Start from ready-made Lemonades